Hi Everyone! You know I helped my friend, Sherry, give a baby shower for her niece! Well, today is Sherry's birthday! Since the shower was Owl themed, I thought I would make her an owl themed birthday card! Hopefully, she's not too tired of seeing owls yet!
This card was VERY simple to make! I used the Wild Card 2 cartridge. All I had to do was change paper on the mat to the color that I wanted and press the cut button. All layers were cut at 4.5" This cartridge even cuts the envelope for you - easssssyyyy!!!
I think she'll like the card. Thank you so much for stopping by today - Mom and I so appreciate your visits and your comments! Until another day, God Bless You!! Donna
Hi Everyone - I needed a quick Thank You card for my boss. She went on a business trip and brought me a Vera Bradley gift back. I loves me some Vera and she knows it!! I have the BESTEST boss in the world - can't say that enough!
I used the Wild Card 2 cartridge again! This cartridge is worth the money as it makes cards within minutes just with the push of the cut button. All layers were again cut at 4.5".
Thanks for stopping by today - we appreciate your visits and comments. My brother, his wife, son, and daughter in law came to Mom's for Thanksgiving. No one makes dressing as good as my mom - it's the BEST!!! It was so good to see my family and eat some of mom's good cookin'!! Until another day, God Bless You!! Donna
In case you're tired of seeing CCR Holiday cards, this is my last. I enjoyed making them but I'm ready to get on to something else too.
This one is CCR Holiday Card #8. I cut it from the same red paper I used on a previous one, lined it white shimmer paper, then added stickles glitter to some of the designs. It's such a busy design, it doesn't need anything else. I think it's pretty and will be enjoyed by someone.
I stamped the same holly on the inside and colored it with green and red glitter gel pens.
Thank you for taking this Christmas card journey with us. Donna will have something tomorrow so be sure to come back. God Bless You!!! Peggy
After all the rich food and leftovers of Thanksgiving, I am always ready to get back to eating normally. I love preparing and eating the Thanksgiving meal but after it's over, I settle back into my normal routine which involves a lot less food. How about you?
My card for today is Cricut Craft Room Holiday Card #25. I cut it from doublesided KandCo. Christmas paper. I lined it with a red glittered paper. This one also has holly cutouts on it so I applied Xmas(I don't even like to type that word but that's the name) Red and Holly Green Stickles to the leaves and berries. I applied Crystal Stickles to the stars.
For the inside, I cut out some holly from the paper and added it for decoration.
Thank you for visiting with us. As always we enjoy your input. come back tomorrow for another Christmas card. God Bless You!!! Peggy
I'm not sure how many people will be looking at blogs today. Everyone is probably out enjoying the Black Friday sales. I'm not sure if we are going or not. Last year we went on Thanksgiving and sat out in the cold at Toys R Us to get Jacob an Ipod. I thought I would freeze but it was fun. I had never done that so I wanted to be part of it. And you know, there was a lot of other people there as well.
My card for today is another of the CCR Holiday cards I made last week. It is Holiday Card #19. I cut if from patterned paper with snowflakes on it. I lined it with a medium blue shimmer paper. Then I added Crystal Stickles to the word Christ. I thought that was all that needed to be emphasized.
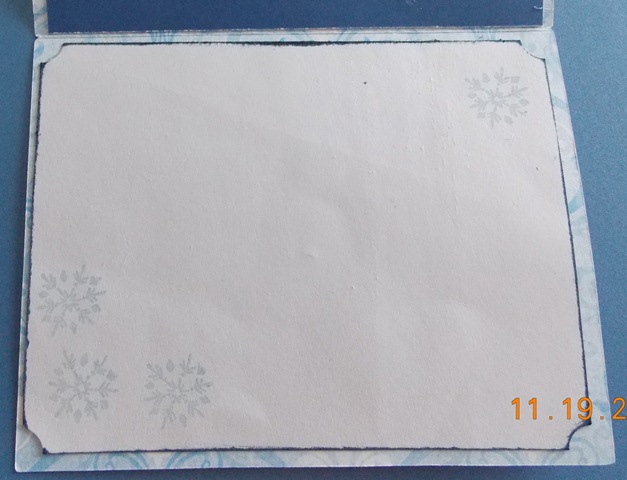
On the inside I stamped snowflakes with light blue ink.
Thanks for stopping by today. We so appreciate your comments and visits. Don't spend too much money today. God Bless You!!! Peggy
Happy Thanksgiving to all our followers and friends. Today let this be the first day of the rest of lives that we offer Thanks to God for all His blessings. I am so thankful for His Mercy that is new every morning. We don't have to wonder, His Mercy and Grace are there every day. If we fail, we are given a fresh new start. How amazing is that? I'm grateful for my family. They are such a blessing to me. I'm grateful for you, our crafting family. You make this blog worthwhile. Thank you, Father, for all your bounty.
I want to show you another of the cards I made using the Cricut Craft Room Holiday Cards. Each one costs $.99 cents. If you're in the Cricut Circle, you get a 10% discount making them $.89 cents. This one is Holiday card #9.
I cut it out of patterned Christmas paper and lined the front with white shimmer paper. You can't tell it's shimmer paper in my photo. Then I got out my Xmas Red and Holly green Stickles and added them to the holly cutouts. I only wanted to out line the shapes, not cover them completely. I added ribbon and tied a bow.
This is the inside. I stamped holly and colored it with Glitter Gel Pens. All I have to do is add a sentiment to it.
Thank you for stopping by today. I hope your Thanksgiving is wonderful. Enjoy your families. Who is going shopping tomorrow? God Bless You!!!! Peggy
I hope you're not getting tired of seeing Christmas cards. These are so easy. They would be really easy if you can just cut them out, line them, stamp a sentiment, then mail them. I'm afraid I'm one of those people who feel like they have to add something to them, i.e., glitter, ribbon, etc. It takes a little longer if you do that but it's fun and they're still easy.
This is #31 of Cricut Craft Room Holidays cards. It's one of my favorites. I cut it out of Mauve Pink paper and lined it with a darker mauve shimmer paper. I added Pink and Lime Green Stickles to the Holly cutouts. Part of the image is ribbon on the bells. I tried to follow the outline with my lime green ribbon.
I stamped holly on the inside and colored it with Glitter Gel Pens.
Thanks for visiting with us today. I'll have another for you tomorrow. God Bless You!!! Peggy
I'm supposed to be baking a Coconut Cake but here I sit writing up all the cards I made. Oh well, I'll get to it in a little while. What is your special dessert for Thanksgiving?
This card is #15 of the CCR Holiday Cards. I love it because of the dove and it's message. I do wish we could have peace on earth. The only real peace we can find is in the Lord Jesus. I cut it from doublesided paper, lined it with white shimmer paper, added Crystal Stickles to the outline of the bird and the letters. I added red ribbon from the dove's mouth.
On the inside I stamped a dove image in light blue.
The stamp is a Hero Arts Stamp.
Thank you for visiting with us today. God Bless You!!! Peggy
I have been working on several Christmas cards this weekend. I finally finished some of them. Provocraft has made it possible for us to cut some of the Cricut Craft Room Holiday cards free this week but I purchased some also. This particular one is number 14. All the holiday cards have cut out fronts that have to be lined to emphasize the features.
I cut this one at 5.5X8.5". When it's folded it will be an A2 card. I cut this from doublesided paper, then lined it with red glittered paper. I tried to position the paper so some of the flourishes would show. I added some ribbon that has a Merry Christmas message on it.
This is my least favorite of the cards I have to show you this week so be sure to check back. Thank you for stopping by. We appreciate your visits. God Bless You!!! Peggy
Hi Everyone - well, you know that I like to make little gifts for Jacob's teachers throughout the year. So I thought that I would make a little something for Thanksgiving. I purchased some cookie dough from my boss' nephew - this cookie dough came already preportioned out. All I had to do was open the package, put the dough on the cookie sheet and bake. LOOOVEEE ITTTT!! While the cookies were still hot from the oven, I put a Hershey's Kiss in the middle of each cookie then sprinkled each cookie with sugar! VIOLA!!! Super Cute, Super Easy, and Super Good!!!
I purchased these fall metal baskets at the Dollar Tree a while back so after the cookies cooled, I put them in a ziplock bag inside the basket. I then placed more Hershey's Kisses around the cookies.
For the tags, I used the Cricut Thanksgiving cartridge to make the note cards at 2 1/2". Simply hit cut and out came the cards. I cut the layer at 2 1/2" and glued to the top. For the inside of the card, I used the negative of the border that I cut for the front.
Jacob asked me not to make him carry the gifts into his teacher tomorrow, so I'm going to take them to the office and have the teachers pick them up. Hopefully, they will enjoy them over their Thanksgiving break.
Thanks so much for stopping by today - we appreciate your visits and your comments. Until another day, God Bless You and our country!! Donna
I am way behind on my Christmas card making this year. Just haven't been in the mood. That's probably a bad thing to admit but it's the truth. I decided to make a couple of cards today since the cartridge A Quilted Christmas was lying on my crafting table. I used the first image on the overlay. It is on page 29 in the handbook. The hardest part about this cartridge is deciding on the colors of the image. Here is my first card.
As you can see, I used dark red, bright red, green and cream cardstock. I used a red gel pen for the holly berries and gold stickles for the flames on the candles. I used Cricut Craft Room to create my different layers at 4.75, then cut them out and glued them together and put them on a 5X6.5" card base. I added some Christmas ribbon I bought last year at Michael's at the end of the season. All the layers make the card sort of 3 dimensional.
Another feature on this cartridge is an actual card feature. It creates a card by cutting a silhouette of the image on the card and then cuts a lining to go under the silhouette. This makes creating lots of Christmas cards very easy.
Thank you for stopping by today. I hope you have a wonderful weekend. God Bless You!!! Peggy
This is the last in this series of CDAC Progressive Freebie Challenges. When I saw this image I immediately thought of my neighbor, Mary. Mary invited several of the neighborhood ladies over for tea one day. She collects tea cups of all kinds and has china teapots as well. This image may be purchased from Priscillastyles. I may have to send this card to Mary.
Card Recipe:
5X5.5" card base
Background Paper - DCWV Lace and Linen Paper Stack
Rose Teapot Digital Image by Priscillastyles
Lace
Pearls
Pebbles Pastel Chalks - for shading paper image was stamped on
Glossy Accents - Used on the flowers and leaves to make them stand out
Promarkers used to color image:
Tea Pot - Almond, Putty, Metallic Gold, Rose Pink, Leaf Green
Here is a close up of the teapot. I hope you can see how the Glossy Accents enhances the flowers and leaves.
Thanks for stopping by today. We enjoy your comments. God Bless You!!! Peggy
As you may have noticed, I have been into simple and easy projects lately. This is another one.
I bought this sheet of Christmas paper either at Michael's or Hobby Lobby. I bought it with another project in mind but as I looked at it, I thought it would be perfect for a card.
I cut a square containing 4 of the ornaments, wrapped gold ribbon around it, tied a bow and adhered it to a 5" square card base.
I used the Cricut cartridge Joys of the Season to cut an ornament to use for the message. The sentiment is from a Hero Arts Clear Stamp Set purchased from Michael's. Right now Michael's has their stamps on sale Buy One Get One Free. I got 2 Hero Arts Christmas sets for the price of one.
Thank you for visiting with us today. We so appreciate your stopping by. God Bless You!!!! Peggy
Hi Everyone!
I hope you had a wonderful weekend! I've been getting ready to help with my friend's shower. We are having cupcakes at the shower and the other day I was in the deepest, darkest part of my walk-in closet (that you can't walk in) and I found a cupcake holder that I had bought a LONG time ago at Big Lots for $1.00. Here's what it was supposed to look like:
And here's what it looked like after I altered it. I wanted it to match the color theme of the shower so I covered each layer with pink and orange cardstock.
Using Artiste, I cut a doily for each layer at 10 3/4", 9", and 7". I adhered all the layers to the tops of each layer.
Using Elegant Edges, I cut multiple borders for the trim to go around the layers. I glued these on using Zip glue. I must say that glue has a very strong odor but it will glue anything!!
Here is the finished product. Now all we have to do is put the cupcakes on it Thursday night.
Thank you for stopping by today! We appreciate your visits and your comments. Until another day, God Bless You!! Donna
Can you believe it's November 2nd? Where did this year go? It seems like it was just New Year's Day. Time does fly, doesn't it. It's time to start thinking about sending Christmas cards, so I thought I would try my hand at one today. This card is so simple. I don't know if I'll send it to anyone.
All I did was run an A2 card through the Cuttlebug, then add some gems and stickles. The stamp is from a Hero Arts set. Super easy. Actually, I think you could just leave all the gems off and it would still be a great card, maybe even better. I love white on white.
Thanks for coming by for a visit today. I hope you have a wonderful, joy filled weekend. God Bless You!!!! Peggy
Yesterday I showed you my first card for the Crafters Digital Art Centers Progressive Freebie Challenge #22. That was the last day for that one but another will be starting probably today. This is my second card I entered. I think this is my favorite of the two. I did use my E2 for the frame on this one.
Card Recipe:
5X6.5" Card Base
Background Paper - KandCo. Susan Wright Botanicals paper stack.
Free digi from CDAC
Cindy Loo Cricut Cartridge for the frame. This particular frame had mushrooms cut out on it but they hid the image so I cut them off. There are some cute frames on this cartridge.
Use any stamp for the sentiment
Ribbon
Gems
Stickles for the flower centers
Promarkers used to color image:
Mushrooms - Gray Squirrel, Tawny Owl, Wild Cranberry (These colors are from the Autumn Limited set)
Leaves - Apple Cider, Lime Green
Flowers - Gold, Sunflower, Purple, Aubergine, Cocktail Pink, Sunkissed Pink
Thanks for your support and comments. I hope you will look into the CDAC Progressive Freebie Challenge. It would be a good way to try out digital images and to see if you like coloring. I always loved coloring so I guess I'm going through my second (maybe my third) childhood. God Bless You!!! Peggy


.JPG)


